This installation guide will walk you through the safe and proper installation process. Before you begin, please read through all steps carefully to ensure a smooth experience. If you encounter any difficulties, don’t hesitate to contact our support team. We’ll be happy to assist you.
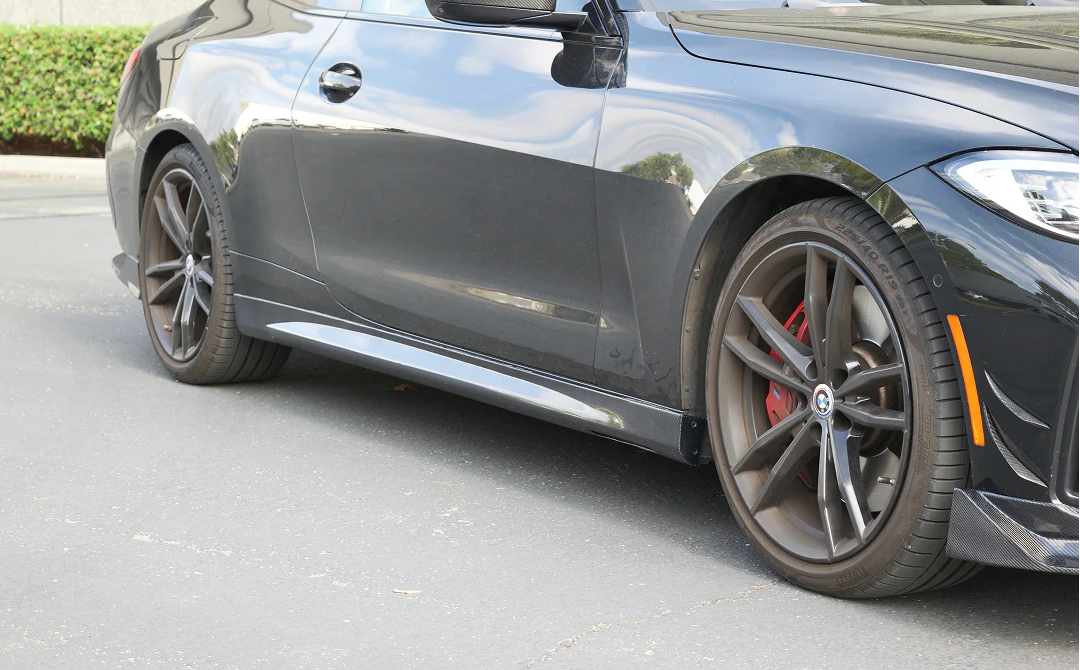
For side skirts that sit underneath the car along the lower sides, like GR86

For detailed pictures and a visual guide, please refer to the PDF version of the side skirts installation. Download the PDF file here ↓
PDF - For Side Skirts that Sit Underneath the car Along the Lower Sides, like GR86
1. Before Installation
-
-
Test fit the items before applying any paint.
-
After installation, do not wash your car or drive at high speeds for 24 hours to allow the adhesive to fully cure.
-
To prevent damage, be careful when getting in and out of the car, and avoid stepping on the side skirts.
- For best results, we recommend a two-person installation.
-
2. Getting ready with tools
-
- Self-tapping screws (Provided with the package)
- Auto double-sided mounting tape (Provided with the package)
- Car Jack
- Socket Wrench
- Screw driver
- Power Drills
- Auto cleaner
3. Raise vehicle to a comfortable working height
4. Clean the painted surface of the original rocker on your car. Ensure the underside portion is free of debris and residue
5. Apply double-sided tape along the edge of the side skirt (as shown in the picture)
6.1. If there are predrilled holes, proceed to step 7
6.2. if there are no Predrilled holes, drill holes in the side skirt first
7. Align the side skirt to the car, then use a drill bit to install it with self-tapping screws
8. All done
For Full Cover Side Skirts Installation

For detailed pictures and a visual guide, please refer to the PDF version of the side skirts installation for full cover side skirts. Download the PDF file here ↓
PDF - Full Cover Side Skirts Installation
Installation Steps:
1. Before Installation
-
-
Test fit the items before applying any paint.
-
After installation, do not wash your car or drive at high speeds for 24 hours to allow the adhesive to fully cure.
-
To prevent damage, be careful when getting in and out of the car, and avoid stepping on the side skirts.
- For best results, we recommend a two-person installation.
-
2. Getting ready with tools
- Self-tapping screws (Provided with the package)
- Auto double-sided mounting tape (Provided with the package)
- Recommended Tools
- Auto cleaner
- Adhesion promoter
- Ramp (Highly Recommend)
- Screw Driver
- Power Drills
- Socket Wrench
3. Raise vehicle to a comfortable working height
4. Clean the painted surface of the original rocker on your car. Ensure the underside portion is free of debris and residue
5. Apply the adhesion promoter to the side skirts to improve the bond, then attach the double-sided tape.
6. Apply the adhesion promoter to the original rocker on the car. Then, align the side skirt with the car.
*Take care not to apply too much adhesion promoter, as it can damage the paint.
7. After aligning it correctly, pull off backing from the double-sided tape and press firmly along the taped sections to ensure a strong bond.
8. Use a drill bit to install with self-tapping screws
9. All done!
Post-Installation Checklist:
Now that you've installed the side skirts, here are a few final steps to ensure they're secure and long-lasting:
-
Check the Fit: Make sure the side skirts sit flush against the rocker panels. If you see any gaps, press down on those areas to secure them.
-
Allow Adhesive to Cure: To let the adhesive fully cure, avoid washing your car or driving at high speeds for 24 hours.
-
Prevent Damage: Be careful not to step on the side skirts when getting in or out of your vehicle.
Enjoy the new look of your car!